LunarG recently made the new Vulkan Device Simulation layer public. This is a Vulkan instance level layer that injects physical device properties, limits and features based on a json input file, simulating different features than the actual Vulkan device you are running on. The idea behind this is to help developers check if their Vulkan applications can handle devices with missing features and tighter limits without having to actually run on a such a device. It’s not an emulation (like a software rasterizer, e.g. WARP for DirectX) and only affects queries against the device limits and features, so you can’t magically get e.g. tessellation support on a device that doesn’t support it by using this layer.
But still this is a nice addition to the Vulkan eco system and is especially handy for smaller devs that don’t own all the different devices they intend to run their applications on. With this layer you check your fallback paths and how your application handles missing device features.
Getting json files from the Vulkan Hardware Database
The layer takes device information to inject from a well-defined json file (you can get the json schema from here) and with my Vulkan hardware database already storing all reports as json files (at least internally, before extracting that data into multiple SQL database tables) this seemed like a natural for.
So when development of that new layer started, Mike (Weiblen) from LunarG contacted me and we started working together on getting the data stored in my database ready to be used with this new layer.
While the json uploaded by the Vulkan Hardware Capability Viewer differs from the one wexpected by the layer (and defined by the json schema) getting it into a format that can be directly used by the layer was actually pretty simple and just a matter of transforming the json into a slightly different format.
With the recent version 1.4 of the CapsViewer I did some major adjustments to that format and all reports uploaded with that version (and newer ones) can now be downloaded in a format that can be used with the device simulation layer. I plan on adding at least partial support for that on older reports too, but you’ve already get access to over 300 reports including pretty much every Vulkan capable GPU out there across Windows, Linux and Android.
The device simulation layer compatible json file can now be directly downloaded from a report:

For those that want to integrate this into their own applications or tool chains there is also an api route that lists all available reports with device description and json download url at https://vulkan.gpuinfo.org/api/v2/devsim/getreportlist.php. If you plan on using the api and need something changed or added please contact me.
Example source code
To accompany this article I have uploaded basic C++ example to github. The example also contains a pre-built device simulation layer along with instructions on how to install it.
The example lists properties, features and limits of the device actual installed in your system as well as a device that was simulated by this new layer.
Setting up the device simulation layer
Note: If you just want to get started, either get the latest LunarG Vulkan SDK (1.0.57 and newer include the new layer) or install the pre-compiled layer included with the example. See the instructions on how to install the layer.
This new layer is not part of the validation layer suite and therefore not installed by the LunarG Vulkan SDK. It must be compiled, installed and updated manually, so here is a short guide on getting it up and running:
- Checkout the VulkanTools repository from https://github.com/LunarG/VulkanTools/
- Build according to the instructions - Note: If you only want to build the device simulation layer, change cmake options before generating the build files
- Put the compiled layer file and it’s json definition (VkLayer_device_simulation.dll/.json) into a path that is accessible by the Vulkan loader
- Add a key for the .json layer definition file to the registry at HKEY_LOCAL_MACHINE\SOFTWARE\Khronos\Vulkan\ExplicitLayers
Using the device simulation layer
Once installed, the layer can be used just like any other layer by adding it to the list of enabled layers at instance creation time:
VkInstanceCreateInfo instanceCreateInfo = {};
instanceCreateInfo.sType = VK_STRUCTURE_TYPE_INSTANCE_CREATE_INFO;

const char* layerName{ "VK_LAYER_LUNARG_device_simulation" };
instanceCreateInfo.enabledLayerCount = 1;
instanceCreateInfo.ppEnabledLayerNames = &layerName;

vkCreateInstance(&instanceCreateInfo;, nullptr, &instance;);
Note: If instance creation fails the layer was probably not installed correctly, e.g. with the registry key pointing to the wrong directory.
Running that piece of code will have the device simulation layer output two messages to stderr:
ERROR devsim envar VK_DEVSIM_FILENAME is unset
ERROR devsim JsonLoader failed to open file ""
These are triggered because we haven’t yet told the layer where to actually load the simulated device properties from.
The layer expects this filename to be passed via an environment variable named “VK_DEVSIM_FILENAME”. In most IDEs (including Visual Studio) you can easily set additional environment variables for a certain build configuration, so setting this is pretty straightforward:
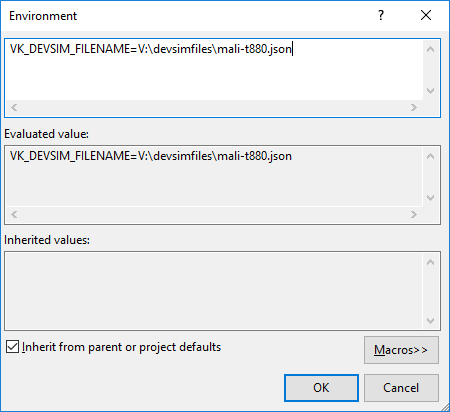
For this article I’m using a json file that simulates a Mali T880 GPU used in many Android mobile devices that supports only a small subset of the features that my actual desktop GPU offers. You can grab the json file from here.
Once this environment variable points to a valid json file any physical device created with an instance that has the layer enabled will pull it’s limits, features, properties etc. from that json file (even if it’s just a partial file that e.g. only has the limits):
const char* layerName{ "VK_LAYER_LUNARG_device_simulation" };
instanceCreateInfo.enabledLayerCount = 1;
instanceCreateInfo.ppEnabledLayerNames = &layerName;

vkCreateInstance(&instanceCreateInfo;, nullptr, &instance;);
uint32_t deviceCount = 1;
// Gets a phyiscal device from the injected json file
vkEnumeratePhysicalDevices(instance, &deviceCount;, &physicalDevices.simulated;);
Using that device all queries that fetch limits, features or properties from the physical device will now refer to those loaded from the json file:
void displayDeviceInfo(VkPhysicalDevice device)
{
	VkPhysicalDeviceFeatures features;
	VkPhysicalDeviceProperties properties;
	vkGetPhysicalDeviceFeatures(device, &features;);
	vkGetPhysicalDeviceProperties(device, &properties;);
	std::cout << "Physical device:" << std::endl;
	std::cout << " deviceName: " << properties.deviceName << std::endl;
	std::cout << " driverVersion: " << properties.driverVersion << std::endl;
	std::cout << "Some features:" << std::endl;
	std::cout << " tessellationShader: " << features.tessellationShader << std::endl;
	std::cout << " geometryShader: " << features.geometryShader << std::endl;
	std::cout << " shaderInt16: " << features.shaderInt16 << std::endl;
	std::cout << " shaderInt64: " << features.shaderInt64 << std::endl;
	std::cout << " textureCompressionASTC_LDR: " << features.textureCompressionASTC_LDR << std::endl;
	std::cout << " textureCompressionBC: " << features.textureCompressionBC << std::endl;
	std::cout << " textureCompressionETC2: " << features.textureCompressionETC2 << std::endl;
	std::cout << "Some limits:" << std::endl;
	std::cout << " maxComputeWorkGroupSize: " << properties.limits.maxComputeWorkGroupSize[0] << "x" << properties.limits.maxComputeWorkGroupSize[1] << "x" << properties.limits.maxComputeWorkGroupSize[2] << std::endl << std::endl;
}
If you run the example application it’ll create an instance without the simulation layer to display some features and limits from the actual device, destroys the instance, creates a new one with the layer enabled and then displays features and limits from the simulated device.